Quick Tip: Show all your (blogroll) links on any page or post

The Links library (sometimes called the blogroll) is an often overlooked feature of WordPress but it can become a powerful ally if you have want to setup a resources “library” of outgoing links to other websites. Of course there’s the blogroll widget that will let you display these links on the sidebar. But how do you get these links into a page or post?

Here’s a super no brainer way to get all your links (a.k.a. Blogroll) created in WP admin to show up on any page or post by pasting in a simple shortcode into the editor. It’s aptly called Links Page and it works well so far. We’re using it for our new WordPress/LAMP jobs site…

Update: we also found another plugin called WP Render Blogroll Links. This one gives a little bit more flexibility that it allows you to specify which categories or turn off category headings.

Both of these plugins seem to work fine with WordPress 3.1.

Quick roundup of 3 lightbox plugins

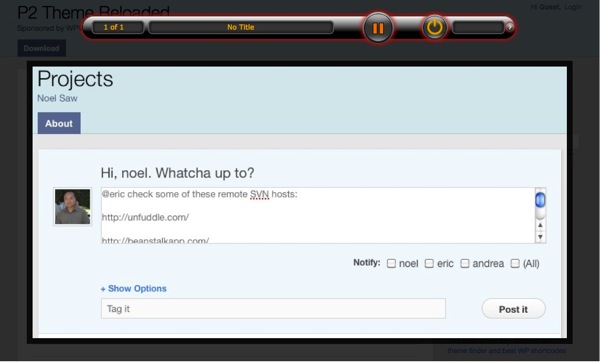
Here’s a feature that content creators usually seek out upon starting out with WordPress: Lightbox plugins. What’s a “lightbox?” Click on any of the screenshots below to see an example.

Unfortunately for now, WordPress doesn’t have this as a standard feature, so new users have to search for a suitable plugin for their WordPress installation.

Let’s take a look at three photo lightbox plugins that maybe suitable for your particular need.

Let’s first take a look at Simple Lightbox. In our experience, it works well on WP sites that don’t have a lot of other plugins installed. Once the plugin is activated, you won’t have much else to do as it will automatically insert itself into pictures when you use the media button in the post / page editor as long as you follow our notes near the bottom of the review. Click the thumbnail of the simple lightbox settings below to see it in action.

We found the second plugin, Photo Lightbox, also works well on WordPress sites that have a minimal set of plugins that are activated. Like Simple Lightbox, it will automatically link up your photos as long as you use the insert media command. The only thing is that it adds a somewhat gaudy slideshow media player buttons at the top of the page.

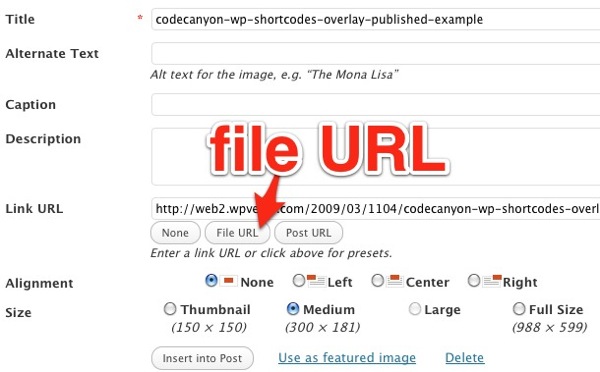
Note: When using both plugins above, we noticed that new installations of WordPress may specify the link URL as an “attachment,” so make sure you click on “File URL” (see below) as the the target otherwise the plugin won’t work.

Wp upload media

The third plugin is not a traditional plugin but part of library of shortcodes sold at Evnato’s Code Canyon called Styles with Shortcodes. The library offers an extensive set of useful WordPress functions including social network icons, block quotes, Google maps, tables, and more. This particular solution is not as user friendly as the other two plugins reviewed here but we were able to get it to work in our environment with ten active plugins.

The steps to use this plugin require more manual work as it doesn’t automatically link up pictures using the usual WordPress workflow. First, you upload the picture using the standard WordPress media dialog box. Copy the uploaded image path into your clipboard. Then click on the “S” button that appears on the toolbar. Then you have to copy/paste the URLs and enter in various settings into the dialog box shown here:

[sws_overlay src=”http://wpverse.com/wp-content/uploads/2011/02/codecanyon-wp-shortcodes-lightbox-dialogbox.jpg” title=”” subtitle=”” description=”Shortcodes Overlay lightbox” thumb_width=”404″ thumb_height=”273″ icon=”red” Align=””] [/sws_overlay]

We wish there was a fourth contender, as we used to use Flexible Lightbox but the developer stopped updating it about a year ago and we haven’t had any luck with it since WordPress 3.0.1.

Let us know what your favorite lightbox plugin is and why you like it.

Improve search results for your visitors

We have reviewed WordPress plugins that help return better search results for your WordPress site like the Relevanssi plugin. But how about helping your users fix their spelling in the search box before they hit “submit” – like Google or major search engines do?

We just noticed this relatively new plugin called “Proper Spell.” We haven’t tried it yet but it’s supposed to auto suggest the correct spelling while the user is typing in something into your search box. It requires a bit of intermediate knowledge as you’ll need to plugin a code

Get it: Proper Spell

Four options for copy editing & proof reading

I’ve been writing for almost 20+ years now and I still have some embarrassing typos or grammatical errors pop up here and there. It’s not a big deal when it’s in your personal email but yikes (!) do you want that happening on your blog when the general public is reading it?

What to? You first step is an almost no brainer, install “After the Deadline” plugin for WordPress, it expands on WP’s built-in spell checker with a grammar checker. It works right inside of your WordPress post/page editor in the toolbar. It’s probably not going to fix and solve everything for you but it will catch things you miss.

The next step is to subscribe to a paid service called “Wordy.” It’s basically a service where you out source your editing to a virtual editing team. Their “Wordy” plugin lets you submit posts and pages to them for review. They claim very fast turnaround time. The workflow is integrated into WordPress so you shouldn’t have to leave your WordPress interface. Their WordPress plugin differs slightly from their pre-paid plans as you get an instant quote as to how much it would cost you to copy-edit this. For example, this post would cost us approximately $10.

If you want more of an all you can eat model, check out Grammarly. For $20/month you can copy/paste as much into their web app window. Unfortunately there is no WordPress integration but it maybe the best bang for the buck for now.

And if you’re on tight budget, PaperRater is similar to Grammarly but free, works quickly and efficiently. Just like Grammarly, you’ll have to copy and paste into a web browser but heck it’s free.

Get it: After the DeadlineWordyGrammarlyPaperRate

Comprehensive set of free CMS plugins

WNET a PBS station in New York uses WordPress to power their website. Now in conjunction with their developers, Tierra Innovation, they’re giving back to the WordPress community a set of unique WordPress plugins that extend its CMS functionality. Here’s a quick summary of the available plugins:

Ajax Report Comments allows users to report inappropriate comments to the administrators.

Audio Playlist manager extends the MP3 play capability of the built-in media gallery.

Billboard Manager is a JQuery-like slider or gallery. You can give it images or videos to cycle through along with unique hyperlinks for each one.

Extend KSES allows your WordPress editor to accept currently disallowed HTML tags like embed or iframe.

Facebook iLike allows your users to like your pages within your WordPress site along with customization options.

Smart Category Ordering allows you to resort your categories at both the parent and children level. This is useful if your theme automatically shows themes on a sub-navigation bar.

WPDB Profiling lets you profile your SQL database. It’s useful to track down errant plugins that might be slowing down your website.

Get it all: Tierra Innovation

Quest for the best WordPress survey tool

We wanted to title this post “Survey of the WordPress surveys” but thought we were being too smart for our own good Let’s proceed!

As many of you know, we’re currently running a survey based contest to gauge the state of themes for the WordPress community. Here’s a quick break down of our experiences so far with four survey tools.

Polldaddy
It’s a survey/poll company owned by Automattic. The site is a standalone web application like Survey Monkey so you can use it on virtually any website. Since the service is owned by Automattic, you’d think it would play nice with WordPress self hosted site. Yes and no, unfortunately right now the WordPress plugin would only see polls not surveys that were created in the web site. So we were stuck  using an iframe embed tag. A drawback to this method is there is no way to set the width of the content in the iframe so there are ugly scroll bars on the post. Update: we were given instructions on customizing the width and style of surveys by the friendly support folks at Automattic and found a “how-to” tutorial as well.

On the authoring front, Polldaddy is the slickest tool out there similar to Wufoo forms with a lot of Ajax drag and drop features. Results get saved into a database and you can receive notifications via email. There are also data filters available to help you create reports.

But since a free account at Polldaddy was limited to 10 questions and 100 surveys, we decided to give some 3rd party plugins a try.

WP Survey And Quiz Tool
This one seemed a little buggy with WP 3.0.5. We saved some questions and when we returned back it, it had disappeared. Setting up contact/user ID questions are separate from setting up the questions so there was a little bit of a disconnect for us. We gave up on this one for now.

WordPress Simple Survey
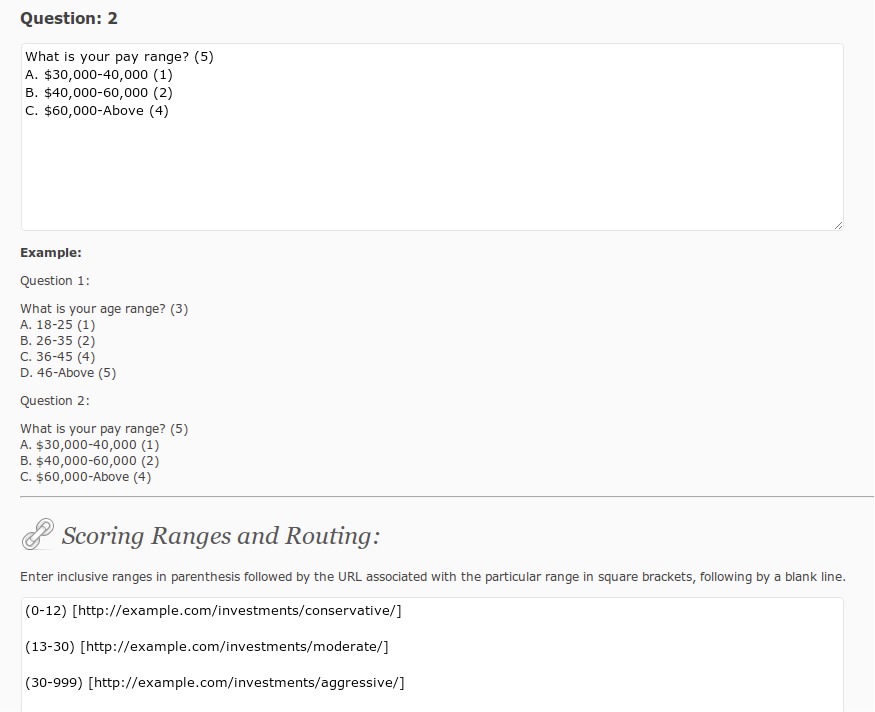
The name almost belies actual usability. This one has the most minimal GUI to setup questions and answers. They need to be setup in text boxes. It has scoring formula to keep track of answers. Could be very powerful if you’re willing to invest the time into it. But it was a little too much for us.

Survey Me

After Polldaddy, we were thought this one had the most potential.

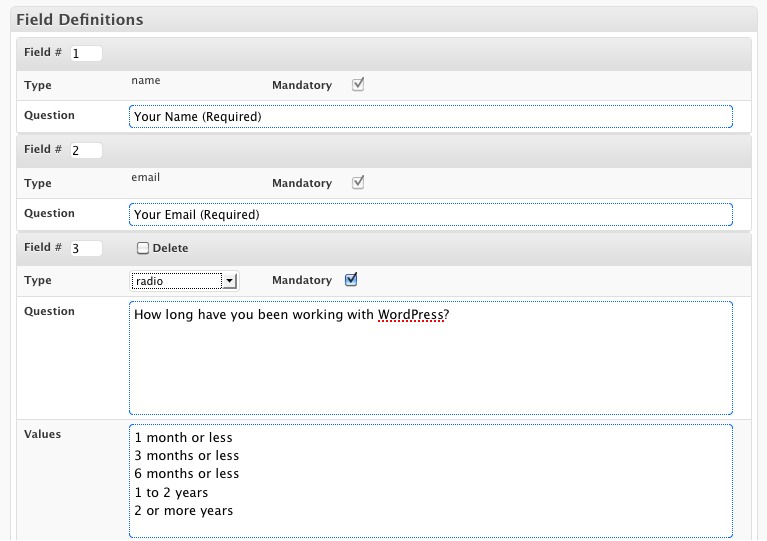
The authoring portion is not slick without drag and drop features but it saves you a few steps by adding contact fields at the top of all new surveys. For new survey it starts you with 10 questions. You have your choice of check boxes, text, long text, radio buttons, and even a recapthcha module.

To add  a new field or resorting the order, you have to type in the new questions or type a new sort number to the new field module and then save the form for the changes to take effect. To sort the order, you have to type in a number into each module. We were excited to use this plugin but it currently doesn’t save results right now within our WP 3.0.5 setup. Update: the developer let us know that a space in the form name was preventing the save. We will give it another try.

In the end, even with the aesthetic problems with using an iframe embed, we decided to stick with Polldaddy until we find something better. But if you’re looking for commercial support and more comprehensive data reporting, Polldaddy maybe the best option for now. Update: since the nice support person at Automattic helped us out even with a free account so we’ll be sticking with Polldaddy for awhile.

Get it: Polldaddy | WP Survey And Quiz ToolWordPress Simple SurveySurvey Me

Quick Tip: Add a smooth call to action button anywhere

Here’s a time saver, if you want to add a nice looking “call to action” (CTA) button like “Signup” or “Download” to your site. Normally that would require a lot of steps: design it in Photoshop, upload a graphic into the media library, and then insert it into your post. And then link it up. Wow, that’s a lot of steps and time.

Well there’s a WordPress plugin to speed that process up a lot – try WP CSS Button plugin and use their short code almost anywhere on the site to display a button like this:
[CSSBUTTON target=”http://startupsinsider.net” color=”FF8A00″ textcolor=”ffffff”]Signup[/CSSBUTTON]
Once the plugin is installed and activated, you simply insert this shortcode in your post editor:

[CSSBUTTON target="http://startupsinsider.net" color="FF8A00" textcolor="ffffff"]Signup[/CSSBUTTON]

You can also replace the hex button text/background color and hyperlink with anything you’d like. And here’s a tip from us, if your site shows an underlining effect on the left/right side, insert this code to the bottom of your theme’s CSS file to hide it.
.button_col a { border-bottom: none; }

Once you make the 2-3 min. investment in time, adding nice looking buttons could take just seconds!

Get it: WP CSS Button plugin

Plugin of the week: Autoptimize to speed up your WP site

One of the best ways to get new visitors to your website and to keep them coming back is to make sure your site loads up quickly. Most experts recommend having your home page load in about 2-3 seconds. If your site is taking more than 5 seconds for the average user, then you have a problem. One of the first steps is to get educated with Yahoo’s Y!Slow tutorials.

Next you can take advantage of some WordPress plugins to help speed up your page. We did a quick review of the popular W3 Total Cache a few weeks ago and overall we liked it. It seemed to have shaved off 1-2 seconds from our home page. The problem with W3 Total Cache is that  there are a ton of options and some of the “on” or “off” switches are labeled in a confusing way.

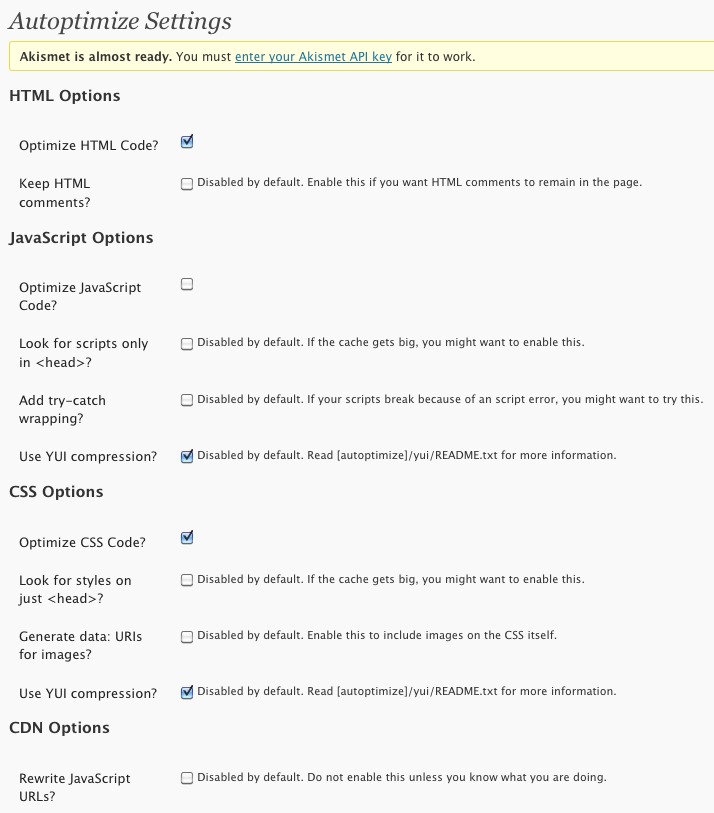
So if you’re looking for something simpler but possibly as effective give Autoptimize a try. Autoptimize’s features are not as extensive as seen by their control panel but nevertheless it has the important features like HTML code, CSS, and Javascript optimization and compression.

We’ve been using it for the past few weeks and think it works really well. We recently did some performance testing with a clone copy of this site on a fresh WordPress installation and noticed that Autoptimizer does make a difference and shaved off 1 second versus not having it installed.

Autoptimize also supports off loading content to a CDN but we haven’t tried it yet but we are going to jump into that water very soon to help speed up our own sites.

Neither Autoptimize nor W3 Total Cache are a magic bullet to solve your WordPress performance problems – especially if your web hosting company has server capacity and/or slow connection issues. But installing the Autoptimize plugin is an almost no-brainer way to squeeze some speed out of your WordPress server.

Get it: Autoptimize