What are the different ways that you can hook up WordPress and social media networks? Take a look at this presentation deck that I’ve uploaded to SlideShare that shows the various Social Media plugins and 3rd party apps that show how you can integrate social media networks with your WordPress site. Make sure you download the PDF and flip through each page to see the progressive steps.
Round up of Three Google+1 Plugins for WordPress
Yesterday we showed you how to add a Google+ profile widget to your site. Now let’s take a look at two new to us sharing plugins with Google+1 integration. The important thing to point out is the term “Google+” usually refers to the social network that in my (humble) opinion is a hybrid of Twitter and Facebook. Considering that Google’s has had two years to dissect their competitors and figure out the best of both worlds, they’ve managed to make something…”magical.”
Then moving on, there’s the “Google+1” button you see on a lot of websites (including our site) is a component of “Google+”. Think of “+1” as something similar to the Facebook like button. But this button keeps your history that just happens to have “+1” navigation button on your Google+ profile page that shows everyone all the pages you have “liked” by clicking on the “+1” buttons. I am sure there’s some privacy control for it but I haven’t dived into it.
The particular button I am using on this site is simply called “Google +1” by Yatko. If you do a search for “Google +1” on the WordPress plugin repository you’ll see quite a few choices. We tried quite a few plugins and this one seems to be the most compatible with different themes so make sure you find the plugin by the author Yatko.
Once it’s installed and activated, just drag the widget onto your sidebar to have it appear.
So what if you want to have a Google+1 button that appears as part of your social sharing button suite? Unfortunately our favorites Sharedaddy or Share and Follow have not been updated with it.
But we just found a new player in town called Digg Digg that happens to have a lot of the same features of Sharedaddy but throws in “+1” button.
As you can see in the admin below there are a ton of choices, maybe too many choices.
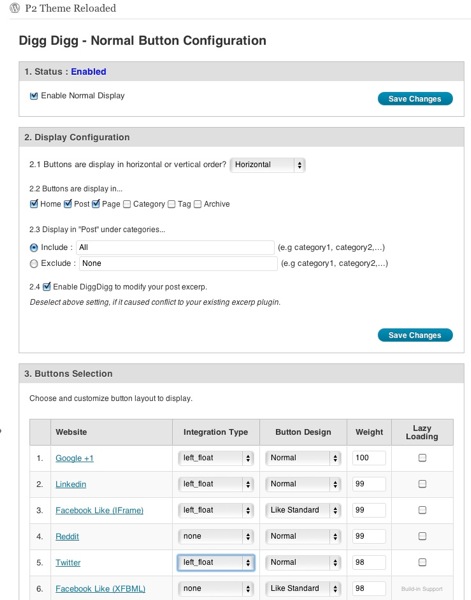
Like Share and Follow you can have it appear at the top of posts with different position options like floating (wrapping) with the content. Depending on your theme CSS you’ll have mixed luck with this. The fail-safe option is to select to have it appear at the bottom of the post so it avoids any mashups. The plugin also offers a “lazy loading” option so your post or page content loads before the javascript needed to render the sharing buttons. That way your page isn’t blank white while it’s waiting for the sharing assets and APIs to load.
The next plugin we’ll take a quick look at is called “Twitter Facebook Social Share” by Kunal Chichkar. This plugin also now features the Google+1 button in addition to the usual Facebook, Twitter, Stumbleupon, etc. services. It’s unique in that the sharing buttons sit stationary on the side of your pages regardless of what position you are on the page. The advantage to this is that it a visitor doesn’t have to scroll up or down to share the post. Here’s a screenshot of how it looks like on a demo site:

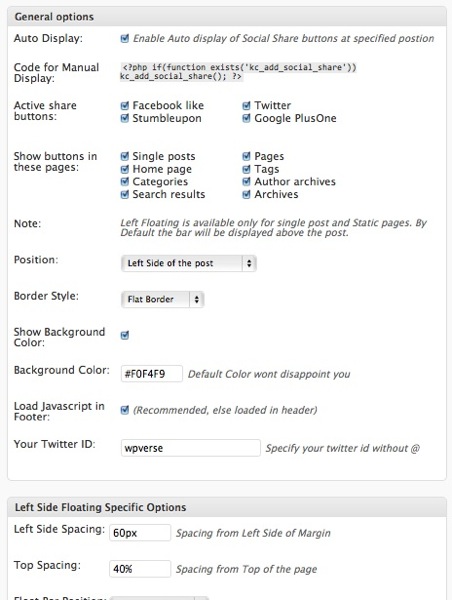
The plugin settings offer quite a few customization options including the ability for the plugin to load the script at the bottom of the page similar to lazy loading. You can also define the background color and turn on rounded corners for the box too. Here’s a screenshot of the options:
So give these a try of either one of these Google+1 plugins for WordPress and let us know what think!
Get it: Google +1 | Digg Digg | Twitter Facebook Social Share
Our Google+ Profile plugin – widget download
 Have you jumped on the Google+ band wagon yet? We have! So in the last week or so we’ve been trying to get a popular but somewhat broken Google+ profile WordPress plugin called Google Cards. For whatever reason many WordPress users couldn’t get it to work on their sites.
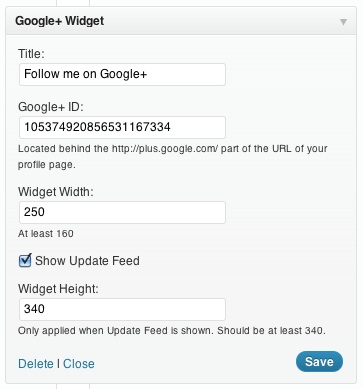
So we ran across a website offering a generic standalone widget at WidgetsPlus.com that seemed to work at least on a static HTML page. We tried to use the HTML Javascript Adder plugin that allows you to paste in JS code but that didn’t work. So we hired one of our WordPress developers to incorporate the functionality of that script into a self contained WordPress widget. You can download a beta of it here: Google+ Profile Widget 1.0a
Please let us know what you think. Make sure you delete your WordPress cache and minified files first.
Sharedaddy adds Linkedin
If you haven’t updated your Sharedaddy WordPress plugin recently, it might a good time to do so because they’ve just added Linkedin as another sharing service. It’s quite useful if you’re running a business or professional related blog or site. Note that as far as we can tell, the Jetpack version of Shareaddy hasn’t been updated with the Linkedin share button yet. Once you’ve gotten the latest copy of Sharedaddy, add Linkedin by going to Settings -> Sharing and drag down the Linkedin sharing button down to “Enabled Services.”
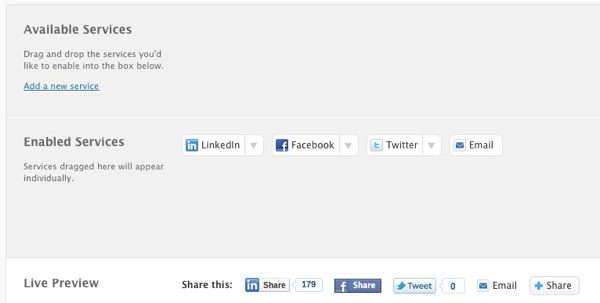
And make sure to click on “Save Changes,”
If you haven’t chosen a social sharing plugin, give Sharedaddy a try.
Get it: Sharedaddy plugin
Plugin of the Week: Sharedaddy plugin
A few weeks ago we looked at Automattic’s Jetpack plugin which adds a plethora of new features for WordPress. One of the more useful plugins incliuded in this swiss army knife of plugins is the Sharedaddy plugin which adds “share” buttons for Facebook, Twitter, Digg, and others onto your WordPress site. Did you know you can get Shareaddy as a standalone plugin too?
Once you install the Sharedaddy plugin (alone or as part of Jetpack), you’ll need to configure which types of sharing you’ll want to show on your WordPress site. You have your choice of Stumbleupon, Facebook, Twitter, Email, Digg, Reddit, and Print services.
Here’s where our (two) tips/tricks comes in:
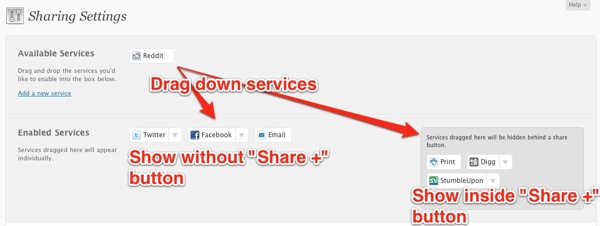
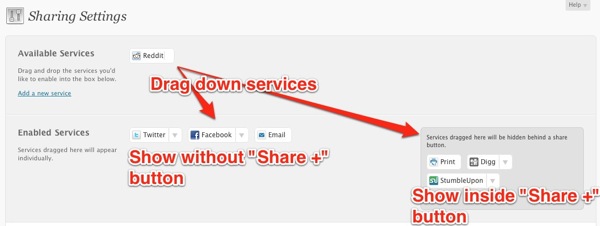
You’ll notice two areas below where you can drag the type of sharing services you want to enable. If you drag the sharing service icons to the left, they’ll be shown in order exactly as you see on the screen. If you drag the icons over to the right, the services will be hidden under a main “Share+” button.
This part might be confusing for users so here’s a quick diagram. You can see the results of this on the bottom of this actual post.
If you’re an advanced user looking to customize the plugin, we converted Sharedaddy into a shortcode plugin for use in one of our client’s custom themes and it has worked well so far. We were able to use CSS to add a colored background and make alignment modifications without much problems.
We were previously fans of the Sociable plugin but with the total lack of paid support provided by WPMU (Inscub) and the developer, we have moved on to Sharedaddy. It is probably the best out of the box solution out there for easy content sharing on your WordPress site.
Update plus 2nd tip: The biggest issue we ran into is that once the plugin is installed and activated, it doesn’t automatically turn on a set of default sharing buttons. So if you just activate it, you still need to define the social networks you want to show up.
We can see a situation where a user may just activate the plugin and forget to actually add popular networks like Facebook and Twitter. So our second tip, is that if you’re moving your site to another server, don’t forget to check and add the services manually otherwise you won’t notice they’re not there until you’re reading your published pages. Yes, we learned this the hardway! Also this would most likely apply to the version of Sharedaddy bundled with Jetpack.
Get it: Sharedaddy plugin
Sociable Pro Plugin customer service: FAIL
One of the first social sharing plugin tools for WordPress was Sociable. It’s a plugin that adds a bunch of little icons at the bottom of your posts so your readers can share it with their friends on various social networks like Facebook, Twitter, and Delicious .When WordPress 3.0 was released, developer “tompokress” took it over. He/she currently offers a “Pro” upgrade package sold through WPPlugins.com/WPMUdev.org.
I recently made the mistake of upgrading to Sociable Pro version for $10ish which includes a quarterly support subscription through WPplugins.com/WPMUdev.org. After I had problems getting it to work on Genesis child themes and Caroline theme, I attempted to contact the developer through WPMUdev.org but I then saw he hadn’t answered anyone’s questions for a month.
So I asked WPPlugins.com/WPMUdev.org to help facilitate communication with the developer, their answer was “it’s not our job, you should try to contact the developer yourself.” I find it kind of funny it was their job to take my money and setup a quarterly subscription but they think it’s not their job to make sure their developers are responsive to paying customers in a timely manner?
At this point it’s not the $10 but the attitude that irks me of any company and/or customer service support representative that tries to pass the buck.
I admit I hate it when I get bad customer service from a company “associated” with the WordPress platform. I have gotten great support from Graph Paper Press, Elegant Themes, various ThemeForest authors, StudioPress and more, so it steams me when companies don’t follow through on their commitments. End of rant.
Automattic releases JetPack plugins for self hosted WP sites
Automattic has just released a swiss army knife of plugins for WordPress self hosted sites called Jetpack. It includes traffic stats, a Twitter Widget, Gravatar Hovercards, URL shortener, social network sharing buttons, LaTeX for mathematicians/scientists, grammar/spell checker, and other shortcodes.
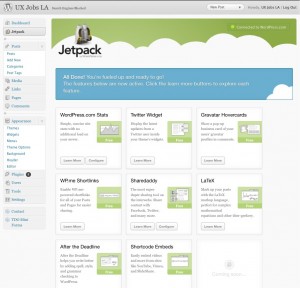
You’ll need to have or create a WordPress.com to activate it’s features. Here’s a screenshot once it’s installed, activated, and hooked up to WP.com. Click for larger size screenshots.
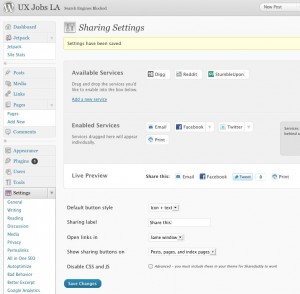
We activated the share feature on our UXJobsLA.com site…
…and it seems to have some hiccups with an older WordPress theme and possible conflicts with another plugin.

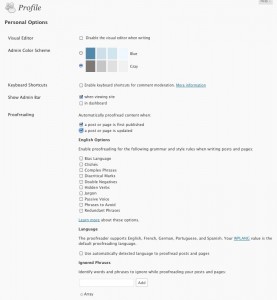
Below is the “After the Deadline” plugin settings for proof reading.
Stay tuned for a full review later today.
Get it: Jetpack
Make your own shortened URLs with le petite url
 You’ve been probably seen those shortened URLs (example: http://goo.gl/8hsrE) on Twitter or Facebook. What’s the big deal about them? With the shorter URL, they allow more of the message to fit inside Twitter’s 140 character limit. People use a URL shortener website services like bit.ly or tinyurl or Google’s goo.gl.
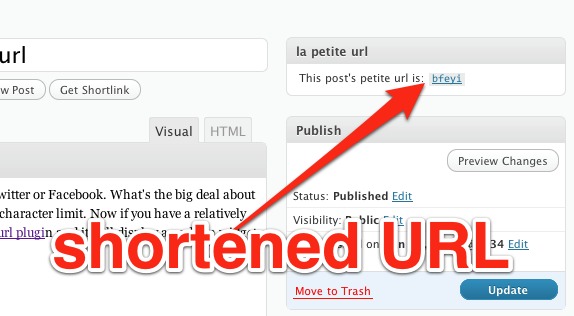
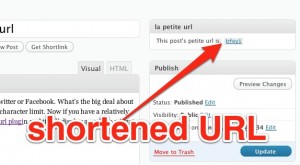
But now if you have a relatively short domain name, you can do the same while keeping your URL. Install the le petite url plugin and it will display an admin widget in your posts and pages with an auto generated shortened URL. The plugin is well written has a fair amount of features and seems to be reliable so far.
Real world example: the plugin generated this shortened URL for this page:
verus the full URL:
http://wpverse.com/2011/01/make-your-own-shortened-urls-with-le-petite-url/
If I was really clever, I would register WPver.se (at a Sweden registrar) and use that as for both my domain and shortener. That would reduce the length of my shortened URL by 3 characters by getting rid of the “com.”
Quick Tip: This plugin includes a widget to display the shortened URL on the sidebar so your visitors don’t have to run the page through a 3rd party URL shortener and it will allow you to keep your domain name branding.
Time Saver: use Pixelpipe to push to 100+ networks
![]() How would you like to have the ability to push (simple) content into WordPress, Tumblr, TypePad, etc. with one click? Or how about sending out a status update to Facebook, Twitter, and Google Buzz with a single little click. Check out Pixelpipe. It’s a free web app service where you can setup all your social network accounts and use one interface to write content and publish it to multiple networks.
How would you like to have the ability to push (simple) content into WordPress, Tumblr, TypePad, etc. with one click? Or how about sending out a status update to Facebook, Twitter, and Google Buzz with a single little click. Check out Pixelpipe. It’s a free web app service where you can setup all your social network accounts and use one interface to write content and publish it to multiple networks.
One of my favorite features? The ability to send an update through your IM client, just open up an IM window and select their “bot” contact/buddy, then type your message and hit enter. Voilà, done!
Expect a slight delay (1-2 minutes) for your content to show up at each network but ultimately it saves a lot of time doing each one manually. Get it: Pixelpipe

